How to set up Windows Sandbox on Windows 11
If you follow news around Windows 11 (and Windows 10 before it), you might have heard of Windows Sandbox, but there's a good chance you may also not know what it is. This is a feature Microsoft added in later versions of Windows 10, specifically for the Pro or Enterprise editions.
Essentially, Windows Sandbox gives you a safe, isolated environment to test software in, very much like using a virtual machine, but even simpler to use. If you're wondering how to set up Windows Sandbox on Windows 11, we're here to help with that.
What is Windows Sandbox?
Windows Sandbox is a feature introduced with Windows 10 version 1903, and it has been a part of Windows ever since. It's only available for Pro and Enterprise editions, however, so there's a good chance your PC doesn't support it. However, there's third-party software like Sandboxie that achieves a similar purpose.
Windows Sandbox relies on virtualization technology similar to using a VM to create an isolated environment for you to test software in. This can be downloading a potentially dangerous piece of software or testing your own software that you're developing, which might cause issues with your system.
Unlike a traditional VM, however, Windows Sandbox doesn't require much work on your part. Everything is set up automatically, and the operating system inside Windows Sandbox is the same one you're currently using. It's just a clean copy of your operating system, which is isolated from the rest of your files so everything stays safe. While it's not as versatile as setting up a VM with whatever settings you want, Windows Sandbox is extremely easy to use.
What you need to run Windows Sandbox
Setting up Windows Sandbox is extremely easy, but there are some things you'll need to check first. Your PC's processor needs to support virtualization, and that feature needs to be enabled in the BIOS. To check this, follow these steps:
1. Right-click the Start menu icon (or press Windows + X on your keyboard), and then choose Windows Terminal (Admin) from the menu. Note: In more recent versions such as Windows 11 version 22H2, this option is just called Terminal (Admin).
2. Type systeminfo.exe in the Windows Terminal window and hit Enter.
3. Near the bottom of the Windows, check the Hyper-V requirements section and make sure all the requirements say Yes.
If you see a message saying "A hypervisor has been detected. Features required for Hyper-V will not be displayed", it means you likely have some kind of virtualization technology installed. It may be that Hyper-V is already enabled, or your PC has some form of virtualization-based protection, which is common in business devices. This shouldn't stop you from using Windows Sandbox.
4. If you see that the Virtualization Enabled in Firmware option says No, you'll need to head into your BIOS settings to enable it.
5. To do this, go to the Start menu and hold Shift on your keyboard while clicking Restart.
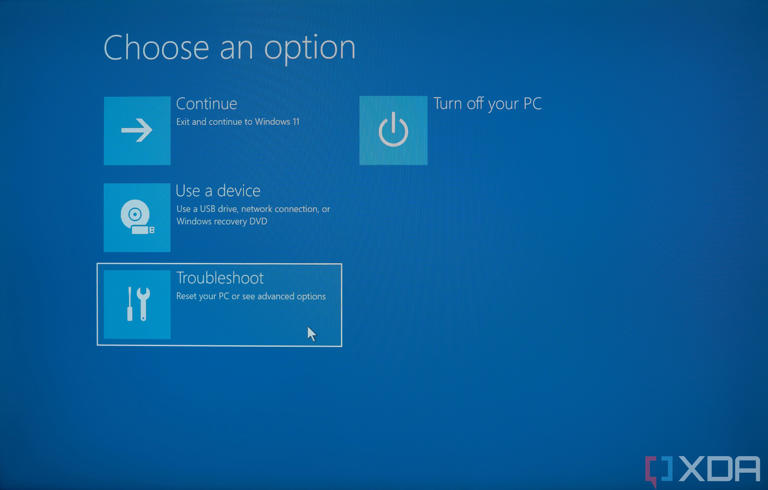
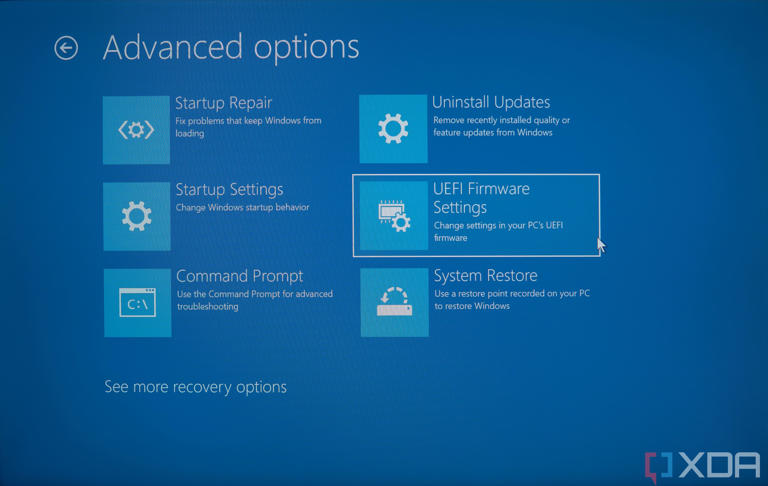
6. When the computer restarts, choose Troubleshoot, followed by Advanced options.
7. Click UEFI Firmware settings.
8. This part will look significantly different based on what PC you have, but you'll want to look for a setting that mentions virtualization. This is usually under the advanced settings in your BIOS.
9. Enable the setting if it isn't already, then save the changes and exit.
10. You should now be able to set up Windows Sandbox
How to set up Windows Sandbox
Aside from making sure your PC is easy to run it, setting up Windows Sandbox is actually incredibly easy. Here's what you need to do:
1. Open the Start menu and enter optionalfeatures.exe, then hit Enter.
2. Scroll down until you find the Windows Sandbox option, then check the box next to it.
3. Click OK and wait for the components to install. Restart your computer when prompted.
4. Windows Sandbox should now show up as an app in your Start menu
Windows Sandbox is one of the best features in Windows 11 Pro
That's about all there is to setting up Windows Sandbox, and it's a pretty painless process for how useful it is. This feature makes it super easy to test software without risking harm to your PC and without having to go any complicated setup steps. It's arguably one of the best reasons to get Windows 11 Pro over Home.
 Chicago
 Track Your Order


 0
0


