How to Convert HEIC to JPG on iPhone to Make Your Photos Work Everywhere
Have you ever taken a photo on your iPhone and realized it’s saved in a format called HEIC?
This format is great for saving storage space but can be incompatible with some websites and programs.
The good news is that you can easily convert HEIC photos to JPGs directly on your iPhone, and even better, you can set your camera to take JPGs.
Let’s get started.
How to Convert Existing Photos (HEIC to JPG)
We’ll use two simple methods to convert existing HEIC photos to JPG on your iPhone. Both methods are easy to follow, so choose the one that best suits your needs.
The File Method
This quick method is ideal for converting a few photos at a time.
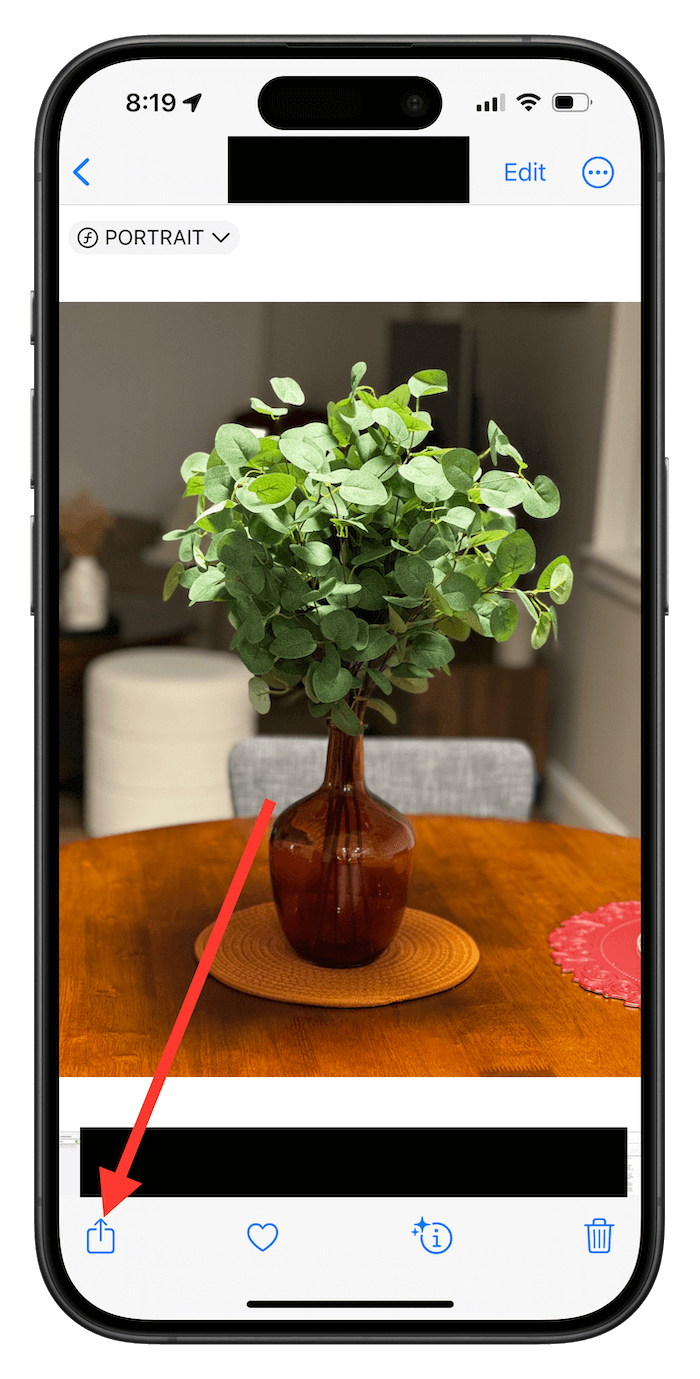
1. Open the HEIC photo in your Photos app and tap the “Share” icon at the lower left corner.
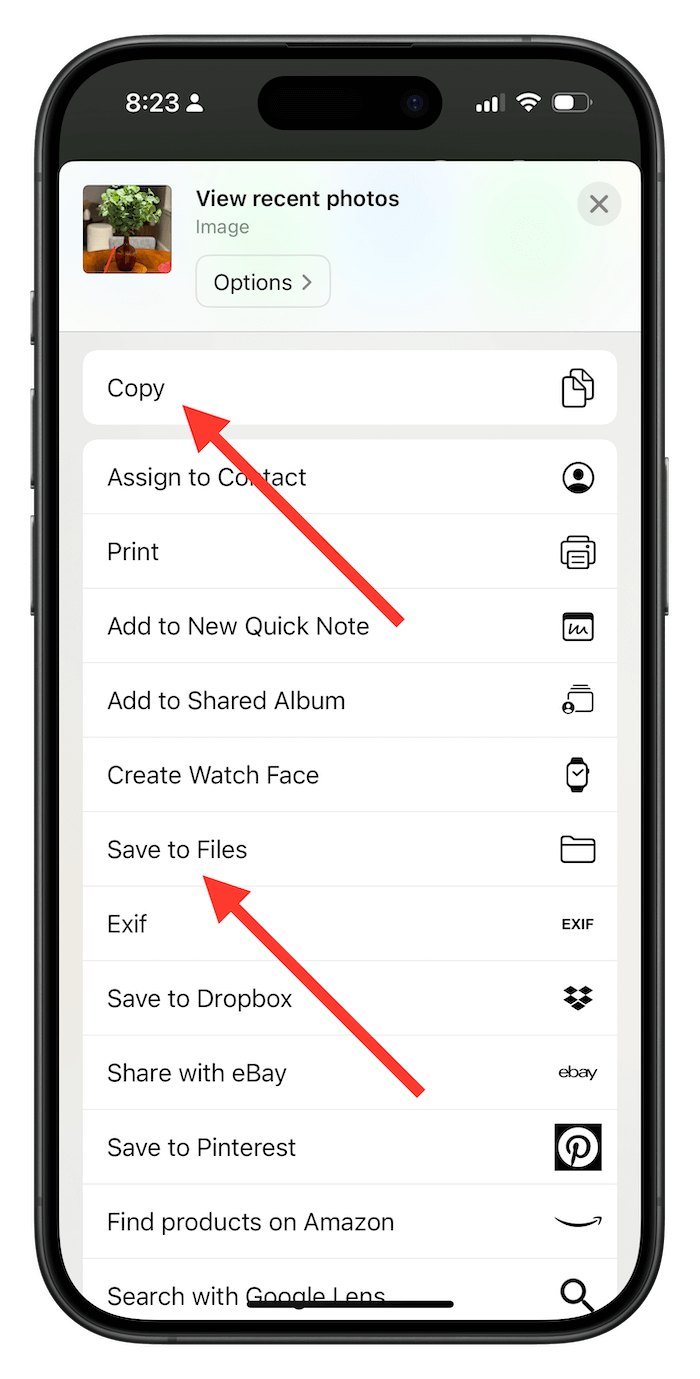
2. Choose Save to Files from the share sheet. Alternatively, you can select Copy to paste the photo exactly where you need it.
3. If you choose to copy the photo, open the Files app and navigate to your desired folder (or create a new one). Tap an empty space and select “Paste.”
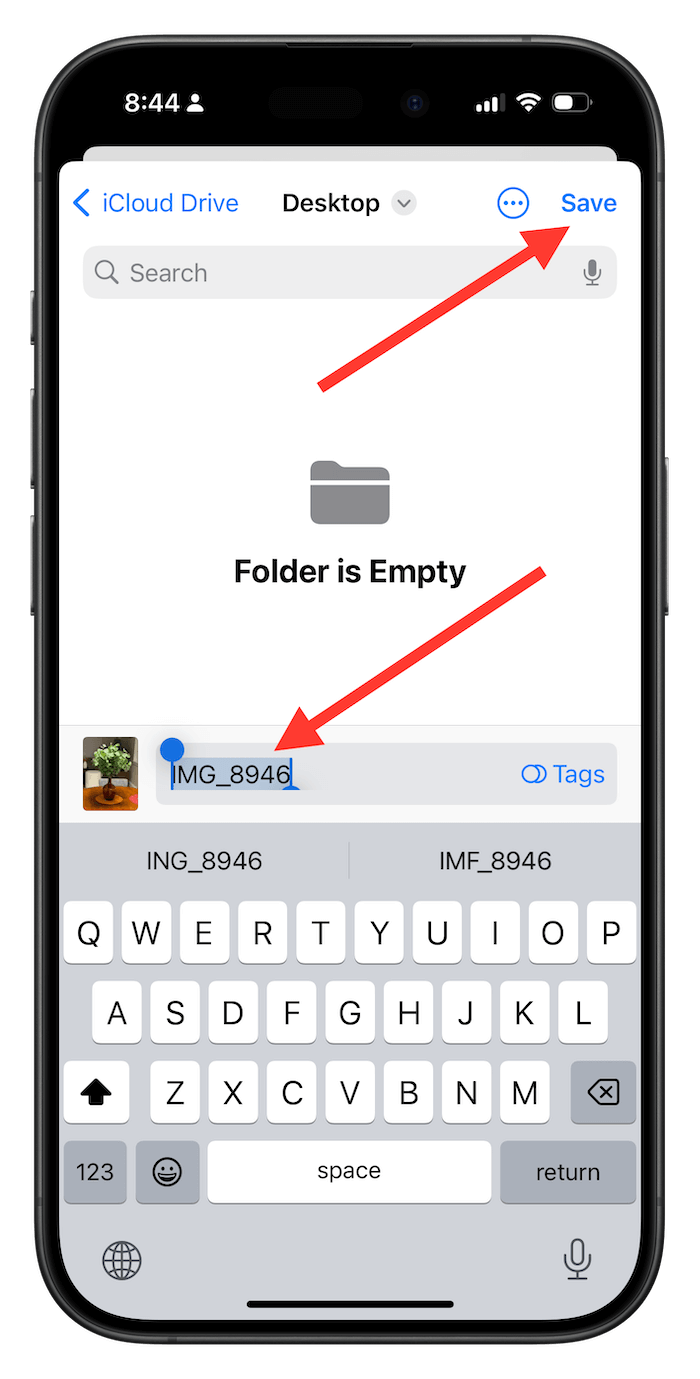
Otherwise, you can just hit Save at the upper right to save the photo as a JPG.
You’ll have the option to give it a tag and rename it instead of using the random name that the Photos app automatically assigns to each photo you take.
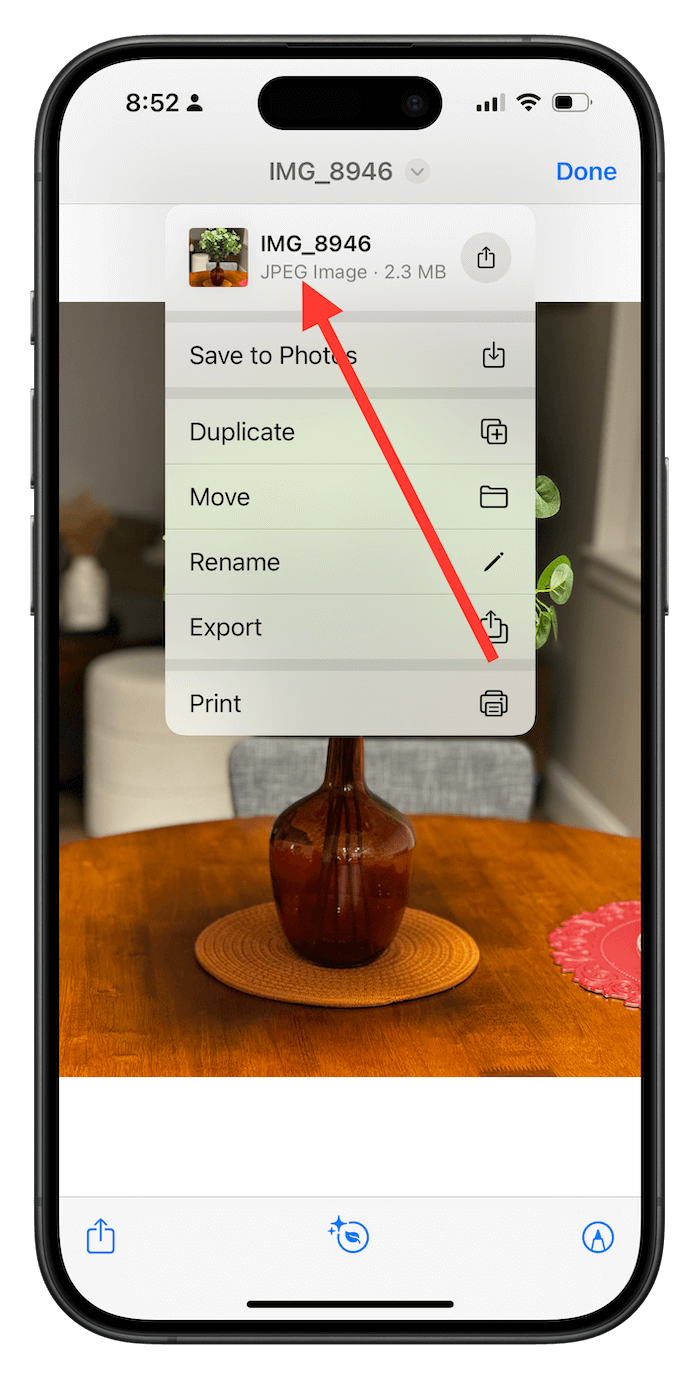
You can check the new file format by selecting the image where you saved it in the File app. Then, tap the photo name with the arrow-down icon at the top; you’ll see the new photo format in the dropdown menu.
The Email Method
This method is handy if you want to save the converted photo to a different location, like your computer.
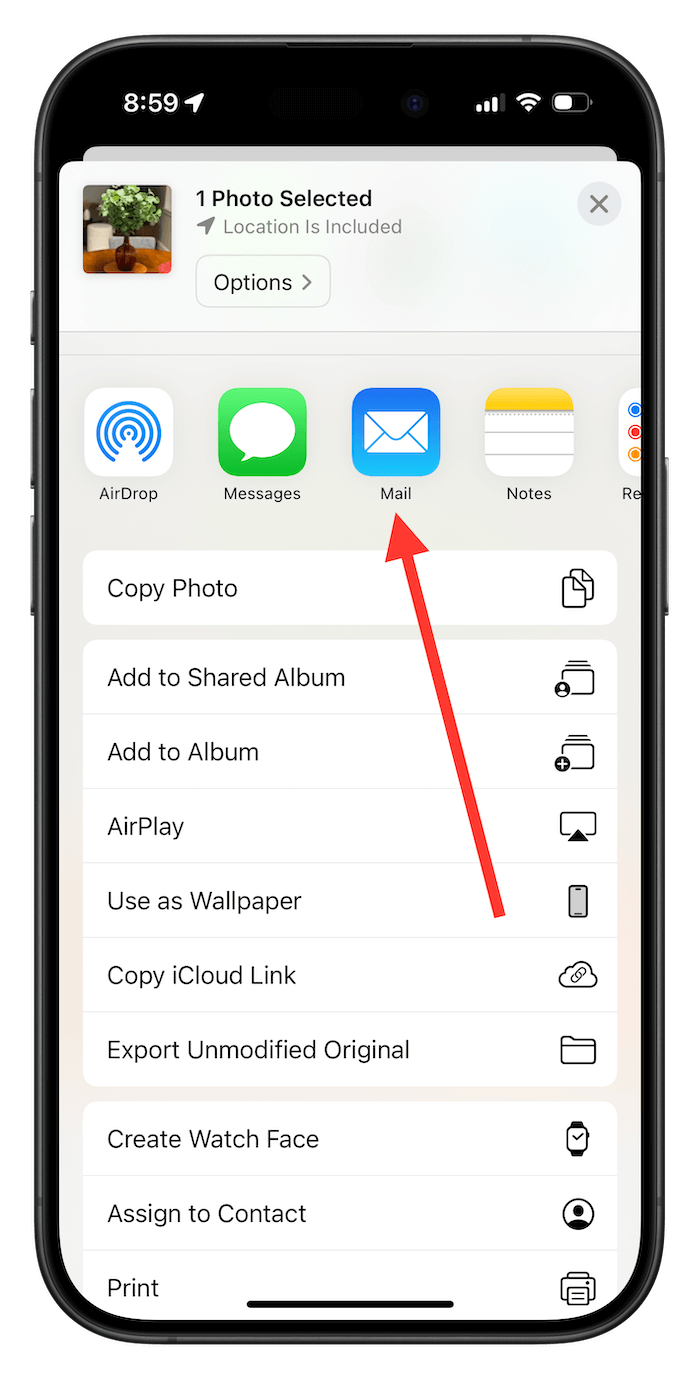
- Open the HEIC photo and tap “Share.”
- Choose “Mail” from the share sheet.
- Attach the photo to an email addressed to yourself (or anyone you don’t mind receiving it).
- Open the email on your iPhone, tap the photo attachment, and save it as a JPG to your phone.
How to Take JPG Photos by Default on Your iPhone
Now, you might want to save yourself time and have your iPhone take JPG photos by default. It’s fairly easy to do so, and it involves a few steps.
Keep in mind that JPG photos take more space than Apple’s proprietary HEIC format, but they’re more common, so you won’t have to worry about compatibility again.
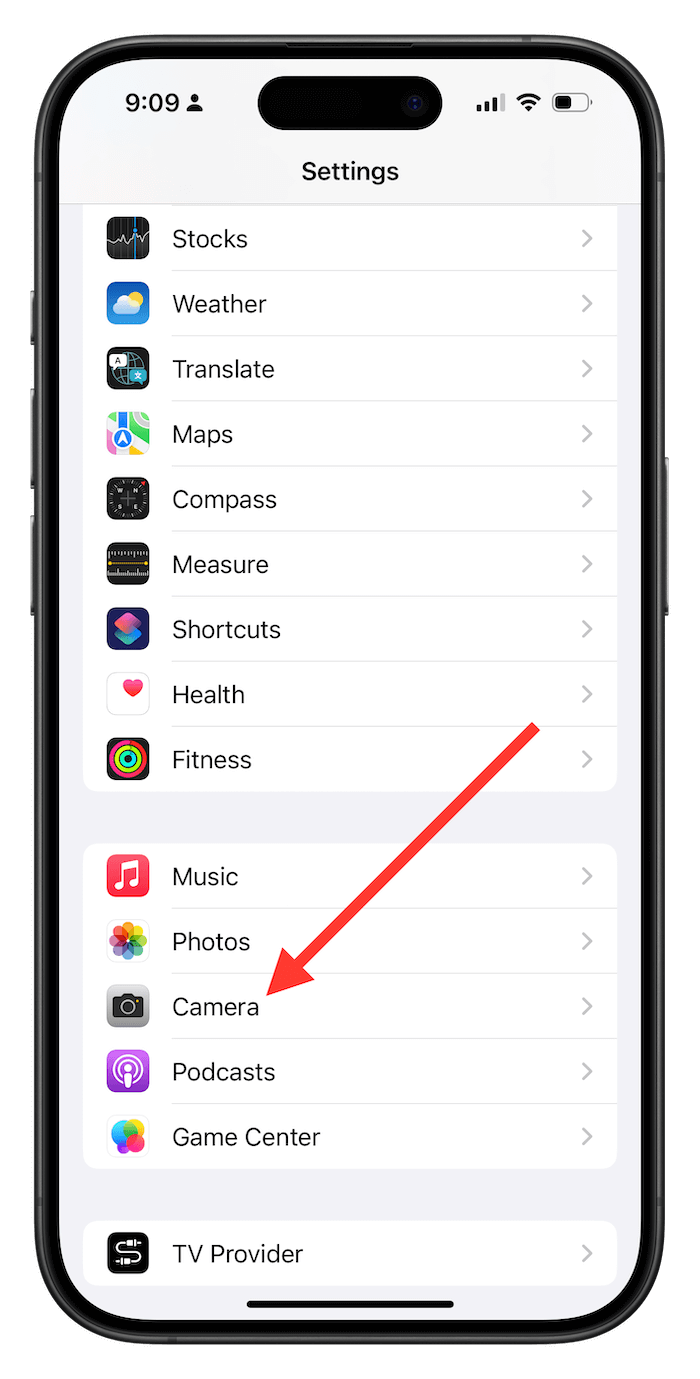
1. Open the Settings app and tap “Camera.”
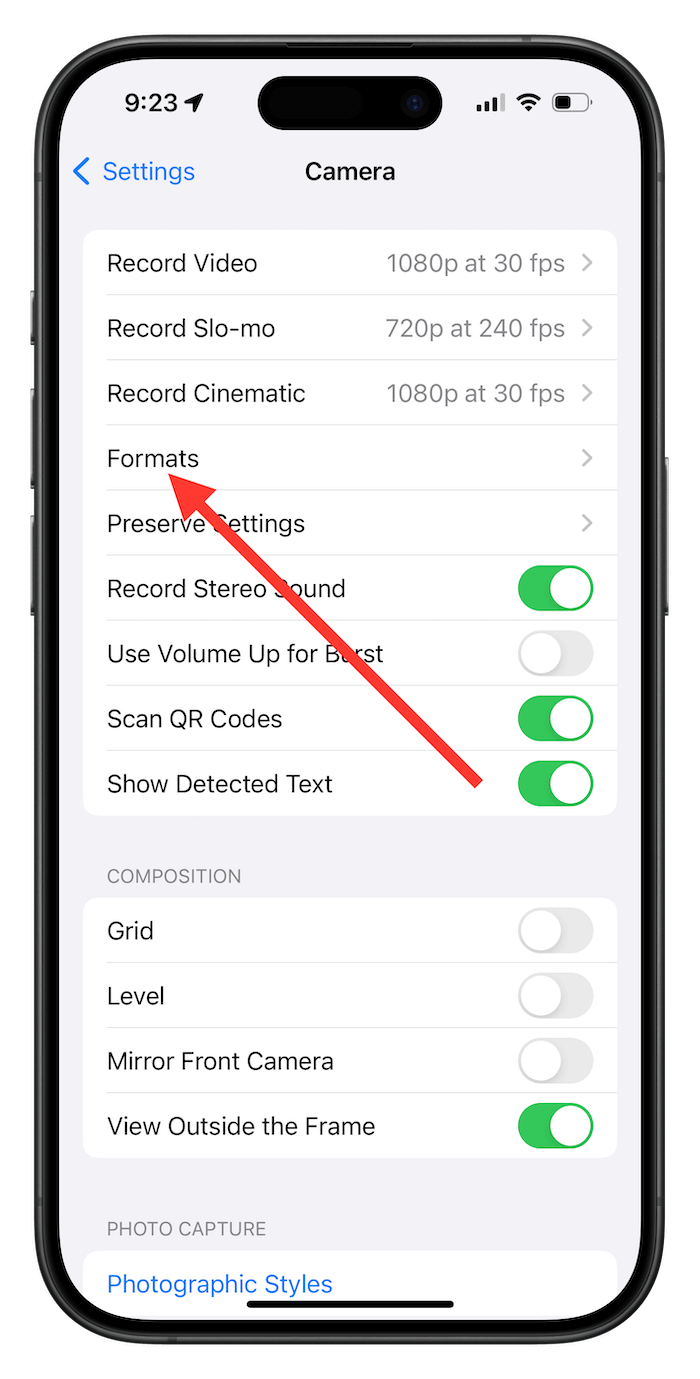
2. Select “Formats.”
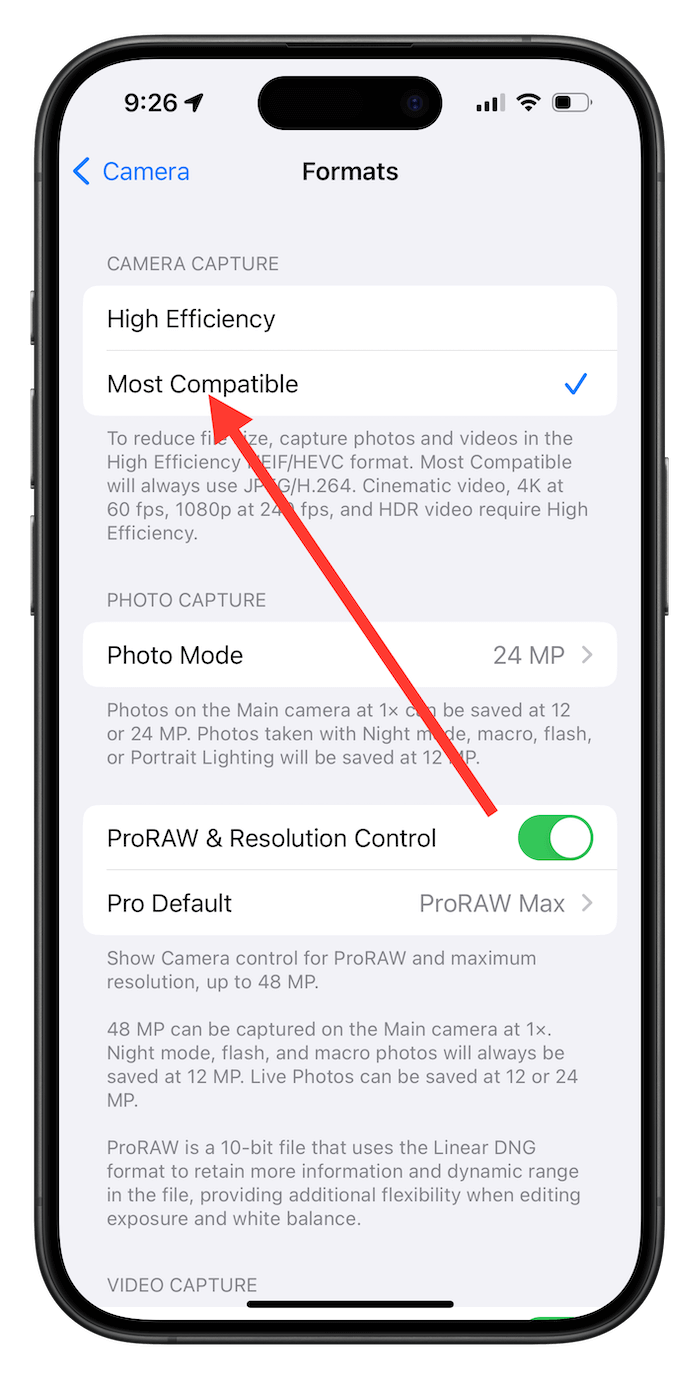
3. Under “Camera Capture,” choose “Most Compatible.” This setting ensures all future photos will be saved in JPG format.
 Chicago
 Track Your Order


 0
0

