How to clean and maintain your mechanical keyboard
Cleaning a mechanical keyboard can be just as daunting as building one, especially if you don't do it regularly. It can be quite the task as the keyboard sits there on your desk and constantly collects dust particles, lint, and hair, among other things, over time. Not to mention, the keycaps on your keyboard also start to shine or get greasy over time as you continue to type with greasy or sweaty fingers. As someone who builds mechanical keyboards for a hobby and spends a lot of time clearing dust, crumbs, and grime, I can't stress how important it is to clean your keyboard regularly and maintain it properly to ensure it works as intended for a long time.
A quick wipe with a microfiber cloth and a cleaning brush is all you need to keep your keyboard clean, provided you do it regularly. That being said, I recommend cleaning your keyboards properly at least once every few weeks to prevent the formation of a gunk layer, which could potentially spell disaster to it. Thankfully, there are some simple ways to clean your mechanical keyboard to ensure it doesn't cry for help.
How to build your own mechanical keyboard
Want to build a mechanical keyboard from scratch? Check out our step-by-step guide to build the mechanical keyboard of your dreams.A simple clean-up routine
How to do a quick keyboard clean-up every day
There are a couple of ways to clean your mechanical keyboard, but let's take a look at the simple cleaning technique first. Before you begin, disconnect the keyboard every time you're about to perform any kind of clean-up to avoid accidental key presses or pulling the cable, among other things. When it comes to simple cleaning, you're essentially just removing dust, crumbs, hair, or other debris that settles on the keyboard surface and between the keycaps.
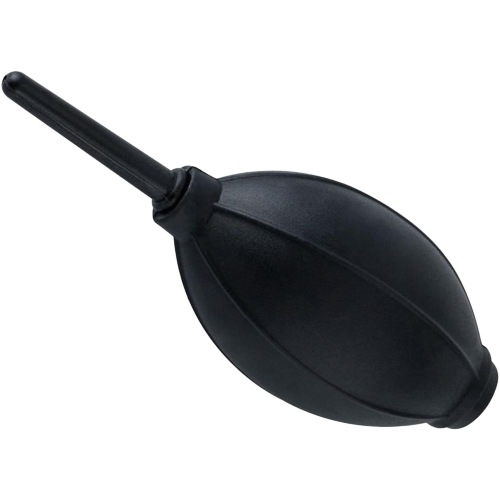
You can use a simple air blower to blow off the particles or loosen the debris that may have settled and then gently shake the keyboard after turning it upside-down to remove the loose debris from the surface. Avoid using compressed air from a can to remove the debris, as it may lead to condensation that can damage your keyboard permanently. A silicone air blower like the one mentioned below does it for me.
Silicone Air Blower
Blow dust and debris off your mechanical keyboard with this air blower.
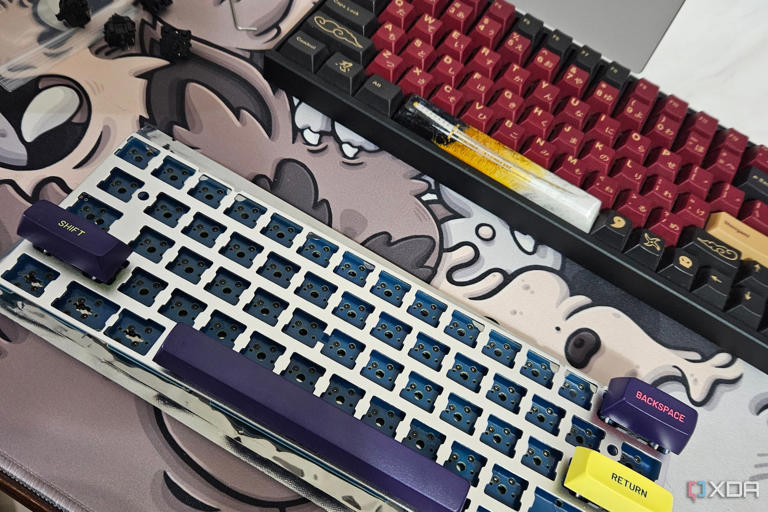
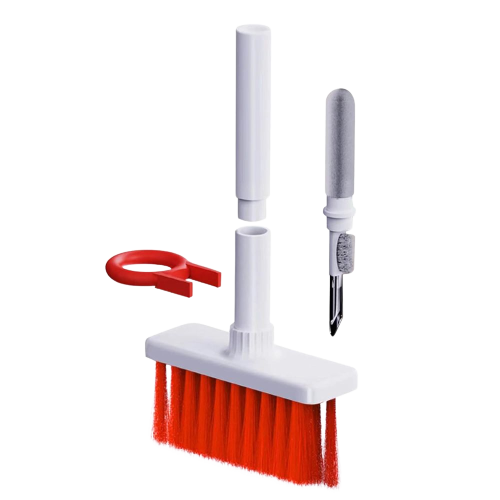
You can also use a cleaning brush to remove dust and debris stuck between the keycaps or corners that are hard to reach. The keyboard cleaning brush I highlighted below is also a great tool to have at your disposal, since it also comes with a keycap puller to make things easier to clean. I don't recommend removing the keycaps every day for cleaning, but it should be done at least once every few weeks or month to avoid having to sit down with your keyboard for a deep cleaning session. I personally have a habit of changing my keycaps quite often, so I end up cleaning the plate or the PCB underneath them once every few weeks, but your mileage may vary.
Deep cleaning routine
How to thoroughly clean your mechanical keyboard
Your keyboard is probably crying for help right now if you haven't cleaned it in a while. Leaving your keyboard unattended will not only form a layer of gunk and lint on it, but it may even lead to jammed keys, rattling stabilizers, and connectivity issues in some cases. That's when you know it's time for a full clean-up.
Removing and cleaning the keycaps
The first thing you need to do is unplug your keyboard and start removing the keycaps. You'll need a tool called a keycap puller that's usually bundled with a lot of keyboards.
Removing keycaps is a fairly simple task that involves wrapping the keycap puller around the keycaps and gently pulling them upwards. You may have to pull some keycaps with more force, but make sure you're holding the base of your keyboard with one hand as you pull the keycap with the other. Don't forget to take a picture of your keyboard before removing the keycaps, so it's easier to reassemble once you're done.
I recommend soaking the keycaps in warm water with just a drop of dish soap for about 15 minutes to get rid of the grease or gunk on the keycaps, if any. This isn't a necessary step, so I only recommend doing this if you're unable to clean your keycaps by simply wiping them with a cloth or tissues.
Do not soak the keycaps in hot water. You'll end up warping them due to high heat.
Cleaning the plate or PCB
While your keycaps are soaking in lukewarm water, you can start cleaning up the plate or the PCB to pick up all the dust particles, lint, and other stuff like chips and crumbs that you may have dropped over time. I recommend using cotton swabs for this as it makes it easier to clear the space between the switches, but you can also do this with a tissue. Make sure to get rid of any particles that may have gathered on the stabilizer housing, as they typically cause the mod keys to get stuck or rattle. You may have to relube the stabilizers after this, but it's entirely optional.
I recommend using isopropyl alcohol to get rid of stubborn stains, but remember to use very small amounts. I suggest applying some on a cleaning cloth or cotton swabs instead of using it directly on the keyboard. This ensures no liquid enters the internals, which could potentially damage the PCB. Do check the keyboard feet for any grime or dust buildup, and give the cable a quick look to ensure there's no damage.
Enthusiasts or hobbyists with more experience of building mechanical keyboards can further dismantle the board for a thorough cleaning, but it's not a necessity. The plate or the PCB will hold most of the dust build-up, and not allow much of it to get through to the case at the bottom. I do not recommend dismantling the keyboard if you're not familiar with the process, as you may end up breaking something.
Finishing and reassembling the keyboard
Once you think you've done enough, you can drop the keycaps back on the switches. Keep a cloth or a tissue handy and clean each keycap before placing it on the board to ensure they're completely clean and dry before going up on the keyboard.
Stop ignoring your mechanical keyboard
A simple cleanup is all you need to ensure your keyboard holds up well over time, so I suggest you start following a simple routine. Just make sure you clean your mechanical keyboard as often as you can to avoid spending an absurd amount of time completely disassembling and cleaning everything. Good luck!
 Chicago
 Track Your Order


 0
0


